Do you have this secret weapon in your construction toolkit?
John Clemons has used SketchUp as part of a BIM toolkit throughout his many roles in construction management over the decades. What began as an experiment in visualization has become an indispensable part of the construction process for him.
Jump to:
SketchUp model used for a conceptual estimate. Model courtesy of John Clemons.
John Clemons has used SketchUp since 2006 for different roles in the construction industry, including as an estimator, a Building Information Modeling (BIM) manager, and currently as a preconstruction manager at Monteith Construction Corp. Throughout his career, common challenges include communicating with stakeholders and achieving accuracy from scant information. He values SketchUp’s flexibility and has used it to generate critical cost and sequencing information, communicate with team members, and visualize projects for clients.
For John, SketchUp had been more than a fun modeling tool. He has used SketchUp as construction estimate software, preconstruction software, building design software, and as 2D graphic software to create key parts of his presentations.
“With SketchUp, it's almost like describing how someone can use a speed square in the field — it does so much more than just give you a square edge for cutting 2x4s when you learn how to use it well. SketchUp really is a useful tool with many use cases, and is seriously underrated in construction.”
–John Clemons, preconstruction manager, Monteith Construction Corp.
Animation of SketchUp model of a farmhouse exterior. Model animation courtesy of John Clemons.
SketchUp in the office
When John started using SketchUp, he was a construction estimator. With the rise of BIM in construction, he eventually transitioned into a role as a BIM manager. Through both positions, he found SketchUp invaluable in his workflow.
Quick estimates
John first began using SketchUp as a tool in his estimating process to help him visualize the materials, including square footage and takeoffs. Construction takeoff is the process of compiling a list of materials and their measurements to calculate the cost of a project from a material perspective. As his proficiency with SketchUp grew, he also used it as a visualization tool to help clients understand different project approaches and to wow prospects with a little something extra in his firm’s proposals.
Relaying cost breakdowns with SketchUp
After John created a model for estimating, he would create cost breakdowns by assigning materials in SketchUp to certain construction components. By selecting a material and choosing Faces Only, he can see the square footage of that material. This way, he knows how much of a material he has, making it easy to calculate the cost of those materials.
After that, he created deliverables for client proposals, including project overviews, overall cost breakdowns, cost breakdowns segmented by portions of the project, and bills of materials.
He exported SketchUp views with the projects’ major cost drivers clearly labeled. This helped his firm win work by providing transparent, easy-to-understand pricing. John created project overviews and high-level cost breakdowns with an image of the full model. He used scenes in SketchUp to isolate pieces of the larger project, with more detailed cost breakdowns for those pieces.
Cost breakdowns illustrated using SketchUp models. Images courtesy of John Clemons.
Visualization
Early in his use of SketchUp, John realized the power of visualizing projects for clients, not only to get them aligned on cost but also to drive buy-in for the project at large from collaborators and owners.
Client presentations
One of the first projects John completed with SketchUp was the renovation of a fire hall. John’s firm was working with a draftsman who drew everything by hand. John scanned the drawings and imported them into SketchUp. Using the drawings as a reference, he modeled the building in 3D, adding color, materials, and glazing, then SketchUp’s native styles to add different aesthetics.
“We used my SketchUp model in a presentation with a client, and it was the best thing ever. They loved being able to see exactly what they were getting. We had total buy-in from the time they accepted our proposal to the construction of the building.”
–John Clemons, preconstruction manager, Monteith Construction Corp.
John sometimes renders his models using Enscape and loves how easy it is to use. Often though, even without renderings, he finds that just by creating models and using the styles available in SketchUp, he can create images that make a strong impression on clients.
If a fully detailed model isn’t part of his project deliverables, he can quickly add materials and colors to even a simple SketchUp model to create something to add a wow factor to his firm’s presentations.
“We were working with a partner on a project, and they had created a Revit model. The clients didn’t like the colors at all. I imported the model into SketchUp and used the materials there. They loved it! It only took me a little time, and it made a big difference for the client.”
–John Clemons, preconstruction manager, Monteith Construction Corp.
Presentation cover pages using SketchUp models. Images courtesy of John Clemons.
Helping client decision-making
On a warehouse addition project, John and his team needed to figure out how to accommodate a slope on the site and a restriction on how the final height of the addition could relate to the existing warehouse. His team came up with two possible solutions for their client.
John modeled each option to help the client understand how the design variations would impact costs. The client was happier making a well-informed choice, and John’s team was happy knowing that the client truly understood the option they chose.
Cost estimates for two different warehouse addition options. Use the slider to see if you can spot the difference. Images courtesy of John Clemons.
SketchUp in the field
After a few years as a BIM manager, John wanted to get back into the field, so he began working as a project engineer and project manager.
“I used SketchUp quite a bit as a project engineer/PM. For example, it was an easier way to relay an RFI (request for information) than just in writing and snapshots of the drawings. I was also able to craft a few things to help owners make decisions.”
–John Clemons, preconstruction manager, Monteith Construction Corp.
John builds his 3D models following much the same order of operations of how buildings are constructed in the field — from the ground up — which helps to create a tight connection between model data and building processes.

Animation of SketchUp model of dining hall. Animated model courtesy of John Clemons.
Construction sequencing and logistics
John also uses SketchUp for site logistics and construction sequencing. It helps him and other stakeholders visualize the steps that need to be taken to build a project.
In one example, John and the team at his previous firm, Kinsley Construction, had a large renovation and addition project. The project included the demolition of a part of the building and an underground addition below what was demolished. By using a SketchUp model to visualize the project stages, John broke the demolition and construction sequences down into clear steps.
He started with a complete model of the side of the building where the work was being done, with the exterior of the rest of the building sketched out for context. He tagged the pertinent pieces of the building for the project and created scenes for each phase, turning tags on and off so the scene would only show what needed to be understood for each phase. By using his model and the scenes as a source of truth for the project, it was easier to explain each phase to stakeholders and collaborators and keep the project on track as it moved forward.
Construction sequence for demolition and addition project in SketchUp. Images courtesy of John Clemons.
Updating existing documentation
John has also used SketchUp to help him create a coherent construction picture out of old or incomplete plans. Recently, he has been using LiDAR on the iPhone with Polycam to get data on real-world conditions. He uses real-world scanned data to verify or adjust existing plans to create a single, accurate model in SketchUp.
He used this workflow on a recent project where he wanted to verify the dimensions of a hallway. The existing plans were old and didn’t include all of the nooks and crannies that had been added over the years. He used LiDAR scanning to create a 3D footprint that he could reference similar to a point cloud, exported the scan into a compatible format, and brought it into SketchUp to create an accurate model so they could approach the project with the most up-to-date information.
Custom construction
SketchUp has come in handy for John at work when there’s a custom piece of construction to finish out a project. His previous firm, Kinsley Construction, was tasked to create built-in booths within a building they were working on. His firm had trouble finding someone to build them, so John took it on himself.
He already had the model of the space in SketchUp from working on phase one of the project, so it was easy enough to add dimensionally accurate booths. From there, he created shop drawings using LayOut, a SketchUp tool to take 3D models into 2D documentation, which he then projected onto the plywood he was using
“SketchUp’s helpful in making sure you don’t create extra waste. You know ahead of time exactly how much of a material you need, and can fit a lot of components onto a single sheet of plywood like puzzle pieces.”
–John Clemons, preconstruction manager, Monteith Construction Corp.
LayOut image of custom-built booth. Photograph of finished booths. Images courtesy of John Clemons.
SketchUp in the workshop
John uses SketchUp when he’s off the clock, too. Working on personal projects in SketchUp outside of his work deliverables has helped him better understand the tool, hone his skills, and work faster when he needs to create deliverables for work.
Building a bridge
John used SketchUp outside of work to build a small bridge for his parents. They have a big property with a small gully running through it that sometimes swells to a creek. He wanted to help his parents figure out how to connect the land on each side of the gully.
John modeled two different style options in SketchUp, so his parents could decide which one they liked better. His SketchUp model was then his source of truth for the project.
From there, he used LayOut for his beam elevations and in his garage workshop. After cutting the plywood, he projected the curvature he needed to achieve onto his garage floor. Using glue, screws, and clamps, he curved the plywood according to his LayOut plans.
When the project was complete, John’s parents had a new bridge they loved, and John had an even deeper understanding of how to use SketchUp and Layout in a construction workflow.
SketchUp model of bridge options. Bridge beam elevations in LayOut. Photograph of curved plywood in garage. Photograph of bridge under construction. Photograph of finished bridge. Images courtesy of John Clemons.
Learning SketchUp
When we asked John about the advice he would give people starting out in SketchUp, he told us:
1. Start in 3D
Instead of drawing anything in 2D, John uses SketchUp to sketch ideas and solve problems. Using SketchUp as his go-to tool for conceptualizing projects has helped him master the basics more quickly.
2. Make it personal
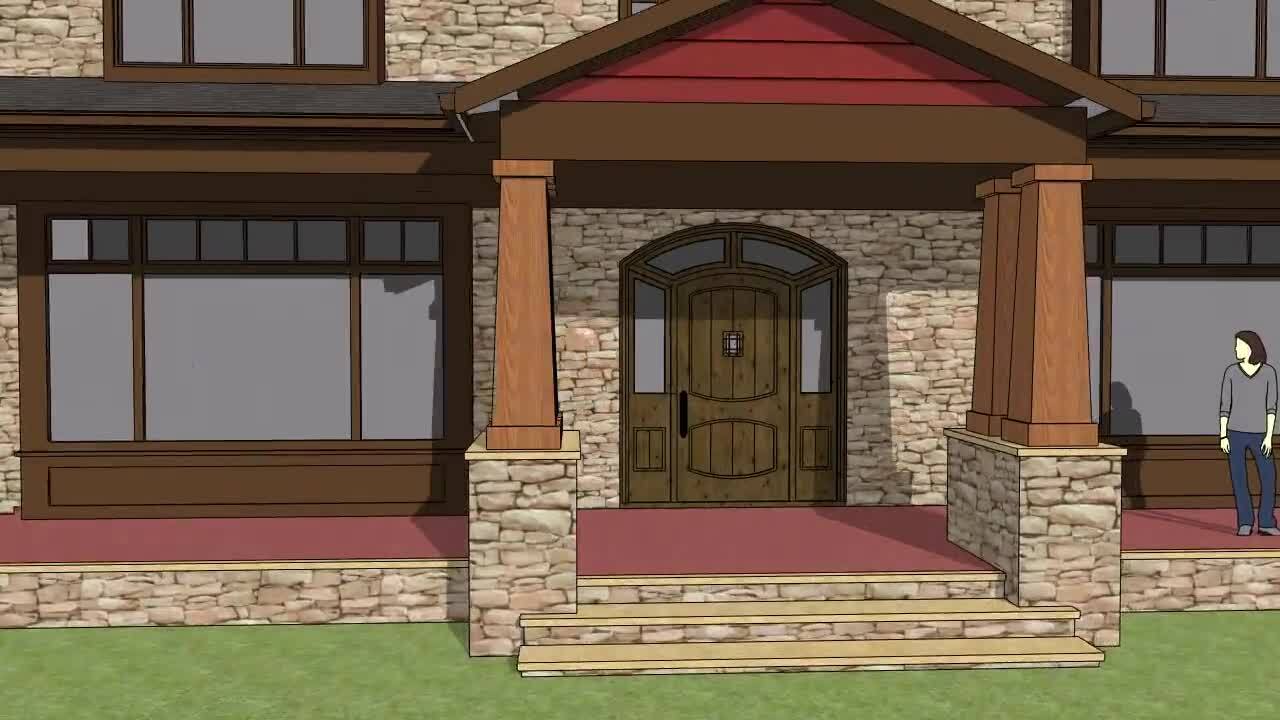
SketchUp model of a home. Images showing SketchUp model of home’s second floor, first floor, and basement. Images courtesy of John Clemons.
Like many other experienced SketchUp modelers, John advises using SketchUp however you can, including for personal projects, to become proficient more quickly. By finding projects that grab his interest outside of work, he’s able to create better deliverables, faster, once he’s on the clock.
John’s used SketchUp to model the last couple of houses he’s lived in to keep his skills sharp. Modeling his homes has been great practice, and has also been practically useful. He uses his models for any work he wants to do around the house, and to answer any questions his wife has about dimensions or remodel possibilities.
3. Watch YouTube videos
John had a special shoutout for Aaron (the SketchUp guy) and the SketchUp YouTube channel. He says that even when he watches a video about something basic, he always learns something helpful.
“The awesome shorts on YouTube and the SketchUp channel in general have been very helpful. It’s taught me a lot of tips and tricks on how I can use the tool, sometimes really simple stuff that has been around forever but that I wouldn't have known on my own.”
–John Clemons, preconstruction manager, Monteith Construction Corp.
Getting your SketchUp journey started
Though John’s journey with SketchUp began over fifteen years ago, his enthusiasm for the tool is still fresh and infectious. Being able to use it for a variety of reasons, both personally and professionally, has kept John hooked. SketchUp has proven an invaluable tool in his construction workflow, from estimating, to helping client decision-making, to sequencing, to helping him be the go-to person for custom construction at Monteith Construction Corp.
If you want to start tackling more construction projects, both large and small, faster and easier, start your free trial with SketchUp today.