Simplify your next project with a 4-step BIM workflow
BIM workflows don’t have to be overwhelming. We talked to SketchUp’s construction software workflow expert, Stephane Desmulie, to walk through an approachable BIM workflow powered by connected technologies.
Jump to:
What is BIM?
BIM has been getting a lot of buzz in the AEC (architecture, engineering, and construction) industry for good reason: it’s an information-rich, error-minimizing, and highly collaborative construction workflow powered by existing and emerging technologies. BIM stands for Building Information Modeling (also sometimes known as Building Information Management). BIM can encompass everything from models to documents to estimating to sequencing. BIM is not just a single tool; it’s a project lifecycle from design to done — and beyond.
Why designers should be thinking BIM
If you’re an architect or designer, do you really need to be thinking about BIM? Short answer: yes. You have to keep up with the workflows that construction and engineering firms favor. A person who is easy to work with and has the right technology and workflows in their repertoire is a person who wins more bids. BIM is the future of the AEC industry, and for good reason. With BIM, you can see project improvements like:
- Higher productivity. 70% of people who implement BIM workflows say they have made them more productive.
- Increased speed of execution. Constructible BIM models increase efficiency, precision and profitability. According to the How We Build Now Report, 13% of total project spend can be saved by capturing and standardizing data more efficiently.
- More connectivity. The number of BIM-connected users is growing. Over 50% of construction firms are using BIM workflows or will in the next 12 months, according to the same report.
- Better project precision. Connecting hardware and software makes for precise, real-time data.
- More BIM-ready models, less time wasted. With 20M+ shared models, Trimble makes it easier for you to stop reinventing the wheel and start innovating in your design.
Check out this proposed BIM workflow for architects and designers to make your next project your smoothest one yet.
BIM workflow phase one: conceptual design
The first part of a BIM workflow is one you’re probably already familiar with: the conceptual design phase. When creating a conceptual design for a BIM workflow, remember that the more information-rich your model, the more successful the resulting workflow will be. Add the relevant information each step of the way so your model evolves with your knowledge.
Creating context for your design
Map of a project site.
Use Add Location in SketchUp to situate your site in the real world. The PlaceMaker SketchUp extension allows you to import buildings, roads, paths, trees, bodies of water and high-resolution aerials to get your project started with rich context and detail.
Aerial view of site context and model.
Scanning your site and importing the data will help you get a head start on your model by giving you a quick and accurate foundation to work from. For a scanning experience that directly integrates with Trimble technologies, your firm or build partners could try the Trimble X7 scanner, which is controlled from a tablet on site. If you can access 3D scanners, take advantage of them by importing a point cloud into SketchUp using Trimble Scan Essentials, included in a Studio subscription.
To create a sustainable design, you can use Sefaira to input real-world climate information, which it infers based on your project’s location. It then generates energy, daylighting, and performance reports based on your building. Sefaira also includes information like glazing, insulation values, and climate data for that location to help you design higher-performance building solutions.
3D conceptual modeling workflow
Once you’ve added context to ensure you’re creating the right building for the space, it’s time for the fun part — creating your conceptual model!
If you scanned your site or an existing building for an addition or renovation, you can create your model directly over the point cloud in SketchUp. After completing the detailed context in SketchUp for Desktop, you can use Trimble Connect to open your project in SketchUp for iPad to do rough sketching around the site for what you hope to create there.
Point cloud of existing building imported into SketchUp.
If you didn’t scan, don’t worry — you’re still not starting from scratch. Let your site context inspire your modeling moves. Quickly incorporate considerations like daylighting, wind, and other environmental factors with PreDesign to make fast iterations of rough modeling ideas and begin to build from your best high-performance option.
Point cloud and model of existing building. Slide to see before and after.
Once you have a rough idea of how your new project will take shape, dive into the details. Adjust your light and material settings to lay the foundations for future renderings using V-Ray. While you’re designing, the more you can do to keep your model organized, the easier it will be to embed important information that will carry over into future, more detailed models.
Rendering of existing building.
Be creative and have fun while you bring your design vision into 3D! Visualize your design throughout your process with renderings, animated scenes, augmented reality (AR), and virtual reality (VR) visualization experiences, all available within SketchUp. SketchUp’s advanced visualization capabilities make it easy for you to collaborate and get feedback from stakeholders. Getting aligned with the project team and stakeholders is essential to any workflow, especially in BIM workflows when large decisions are at stake.
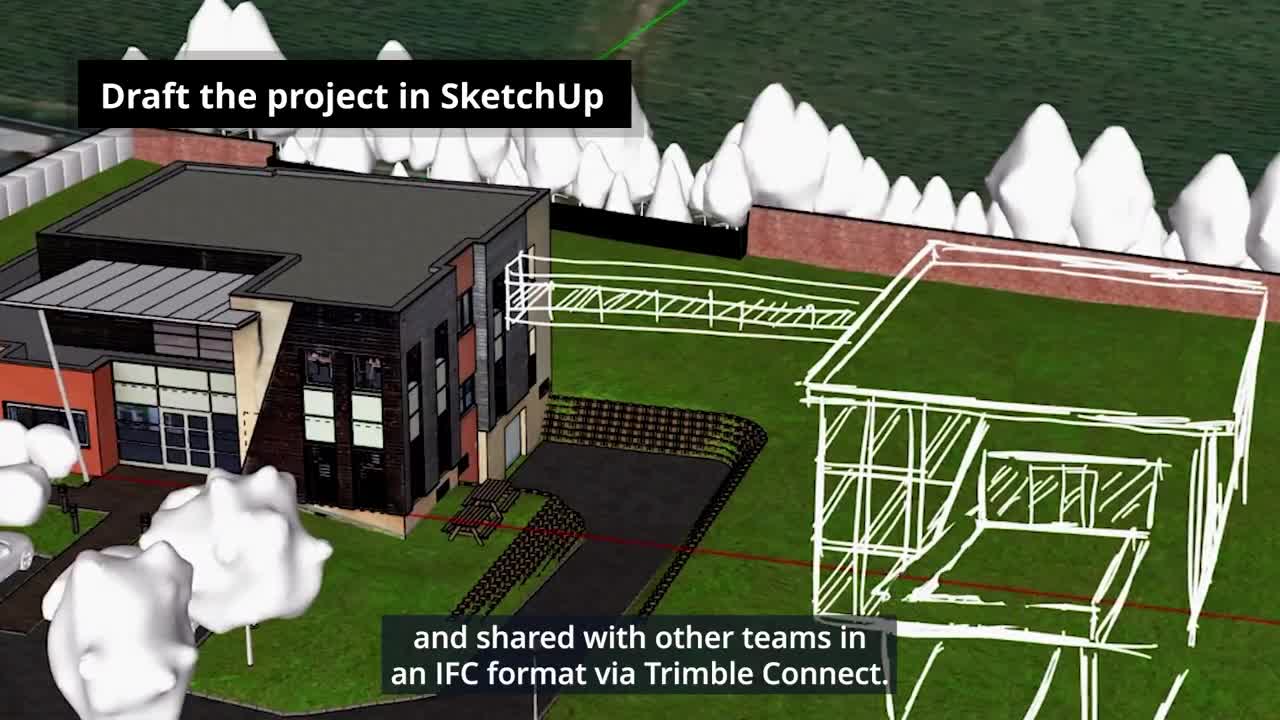
SketchUp model and rendering of existing building and new proposed building. Slide to see before and after rendering.
Once your design looks and feels the way you want it to, you can prepare it for the next phase of the BIM workflow. You can integrate IFC (industry foundation class) data into your SketchUp model using the SketchUp-IFC-Manager plug-in. When you’re executing a BIM workflow, using IFC data is crucial because it’s the best way to collect and archive project information. This information can be leveraged throughout the design/build process and after the building project is completed to aid in building operations and management. Once your model is ready and contains the data the next team needs, you can upload it to Trimble Connect, where it can live as a source of truth for your design.
BIM workflow phase two: structural design
After the architect creates a design, it’s time for engineers to ensure the design will work. To design the structural model, the conceptual model that was uploaded to Trimble Connect can be directly imported into Tekla Structures, with no loss of the IFC data and other information included in the SketchUp model.
Structural model of new proposed building.
After the designer hands off the model they created in SketchUp, MEP (Mechanical, Engineering, and Plumbing) professionals can work with the same model via powerful, professional MEP software tools. The benefit of staying within the Trimble suite is that with a single upload to Trimble Connect, the same model can be connected to software to model mechanical, electrical, and plumbing components.
Information and MEP models work together in one program.
The common data environment is crucial to a BIM workflow because it keeps all stakeholders on the same page through the life of a project. When a team sets the stage with a single model that contains all of the information — not just the design but also the essential structural and MEP components that will make the design work — they have created an information system that is easy for anyone to understand. An owner may not understand 2D construction drawings that show the complexity of a building’s network; 3D makes it easy for anyone to visualize the project and give their input.
BIM workflow phase three: technical design
Now that the conceptual, structural, and MEP designs are ready, they can be imported into a shared data environment like Trimble Connect. Just like that, the project team has a complete, data-rich model. Now, everyone can communicate across teams with a common understanding of the project. We recommend using Viewpoint for project management, which will help ensure your teams are staying on the same page — without important information getting lost in email threads.
Rendering of new proposed building.
This is the time to find any clashes, which will be easy to detect because they’re obvious when you see them in 3D versus in 2D construction drawings. If you use one, the point cloud displays interactions with the existing building components. As the designer, you can easily discuss the potential issues you find with the project team and quickly create design variations that will alleviate clashes and maintain the overall feel of the project.
Renderings showing exterior and interior details of new proposed building.
Begin modeling a more detailed layout and tweak any changes you want to make to the interior based on the information you gained from other teams. This is the time to think about the as-built construction execution details and how they will show up in your design – from wall paneling to the screws you’ll use. To help stakeholders visualize the final project, use V-Ray for Studio to create stunning renderings directly from your model.
Without leaving the CDE (common data environment) you’ve created, you can generate final 2D details and presentation documents with LayOut.
BIM workflow phase four: documentation and delivery
Model showing construction equipment and foundation laid for new building.
Now it’s time for the fun part: building what you’ve been working on in 3D! The construction team can do a bit more modeling to ensure smooth construction execution. They can outline the plan installation for the site in LayOut, ensuring heavy machinery and deliveries have a space for a clean, organized site. The construction team can also create scaffolding in SketchUp — the ScaffMax plugin for SketchUp helps create a 3D model of the scaffolding to determine how much scaffolding is needed and how much it will cost.
Model showing scaffolding around a simple building shape.
Structural engineers can import the structural plans they created into Tekla Powerfab for steel fabrication. In the connected construction environment, the project team can get real-time feedback via both fabrication monitoring and site delivery monitoring. Leveraging Trimble Connect AR, the project team can combine real-world site data with the models you’ve created to visualize how far the project has come and how much more there is to do, making it easy to keep managers, contractors, subcontractors, and other stakeholders on the same page.
Models of the construction site.
Staying within the common data environment of Trimble Connect, the project team can disseminate execution documents for the various people working on the project. Viewpoint helps keep the project on track by automating tasks, forms, processes, and reports for project control, quality control, and document control — all with a tight connection between the site and the office. If your team is deploying scanners or robots, they can place them on-site for project execution to upload real-time data into the project management system, cutting down on surprises. Your BIM-powered project will be streamlined and excellently executed.
Enjoying the big benefits of BIM
Imagine a project where there are no surprises on timing or budget, no safety issues, and no miscommunications. Implementing BIM will enhance every aspect of your next project by ensuring all stakeholders can access the right information at the right time. From the architect’s first sketches to the subcontractor putting the final screw in place, BIM projects are well-documented and well-coordinated.
As an architect, you can start thinking BIM on your next project, and make tweaks to your workflow for better handoff and communication with your structural and MEP counterparts. An architect who is easy to work with is an architect who wins a lot of bids.
Inspired to think BIM on your next design? Get started with a free trial of SketchUp, with access to a suite of powerful tools and cloud storage that will help you kickstart your BIM-powered design workflow.